Quickbooks Online Setup
No video selected.The QuickBooks Online integration is available for all Tech Suite users and will allow you to transfer documents. If you’re interested in setting up QuickBooks Online, please contact help@aimsmarter.co.uk and they will provide you access to this.
NOTE: This will only push over newly created documents in the Tech Suite to QuickBooks Online after the integration, not current existing documents in your Tech Suite. Also, the Purchase Orders will only push over to QuickBooks Online if you have QuickBooks Online Plus or Advanced. The Purchase Orders will not display in your QuickBooks Online account if you are using Simple Start or Essentials.
This integration will also allow you to import your customer database into the Tech Suite. This is available so the records match in both systems and any documents pushed from the Tech Suite to QuickBooks match with the correct customer.
Settings Page
Under your Settings click QuickBooks Online. If you do not see this option please contact help@aimsmarter.co.uk for assistance.
At the top right of the Page, there is a Connect button. When clicked this will open a new window for QuickBooks Online and ask which account you wish to connect to. Once set this will be the QuickBooks system the documents from the Tech Suite are pushed into. This will only push new documents created moving forward. Order documents previously created in your Tech Suite before the integration will not push to QuickBooks.
Document Sending Controls
Here you have the option to choose which documents you wish to push into your QuickBooks Online system. You can choose by checking the box next to which documents you wish to push.
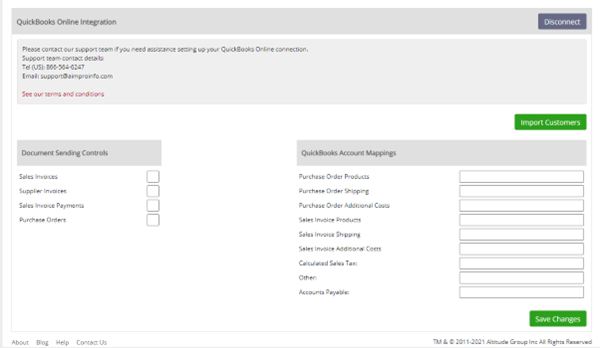
QuickBooks Account Mappings
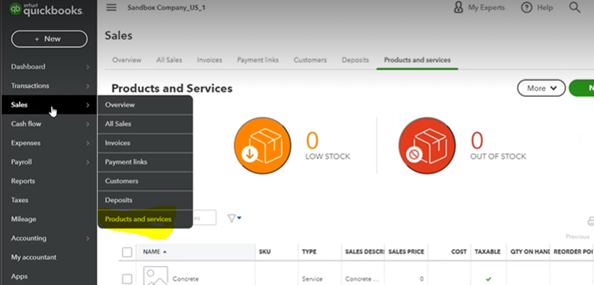
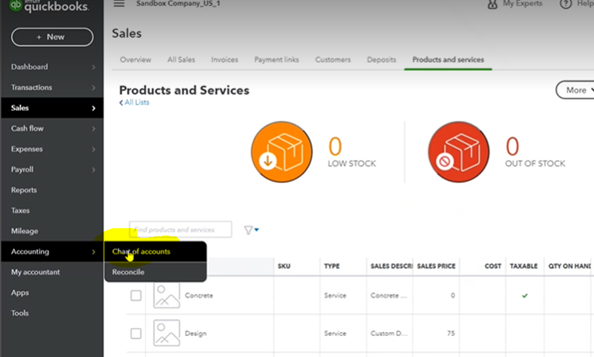
Here you can set the account mappings for the various types of transactions. The text here needs to match the account set in the QuickBooks system. These are matched on the text entered in the NAME field in QuickBooks as shown below. In your QuickBooks Online, this can be located under Sales > Products and services. If you already have these in your QuickBooks account, you can copy and paste those into the Account Mappings section of the Tech Suite.
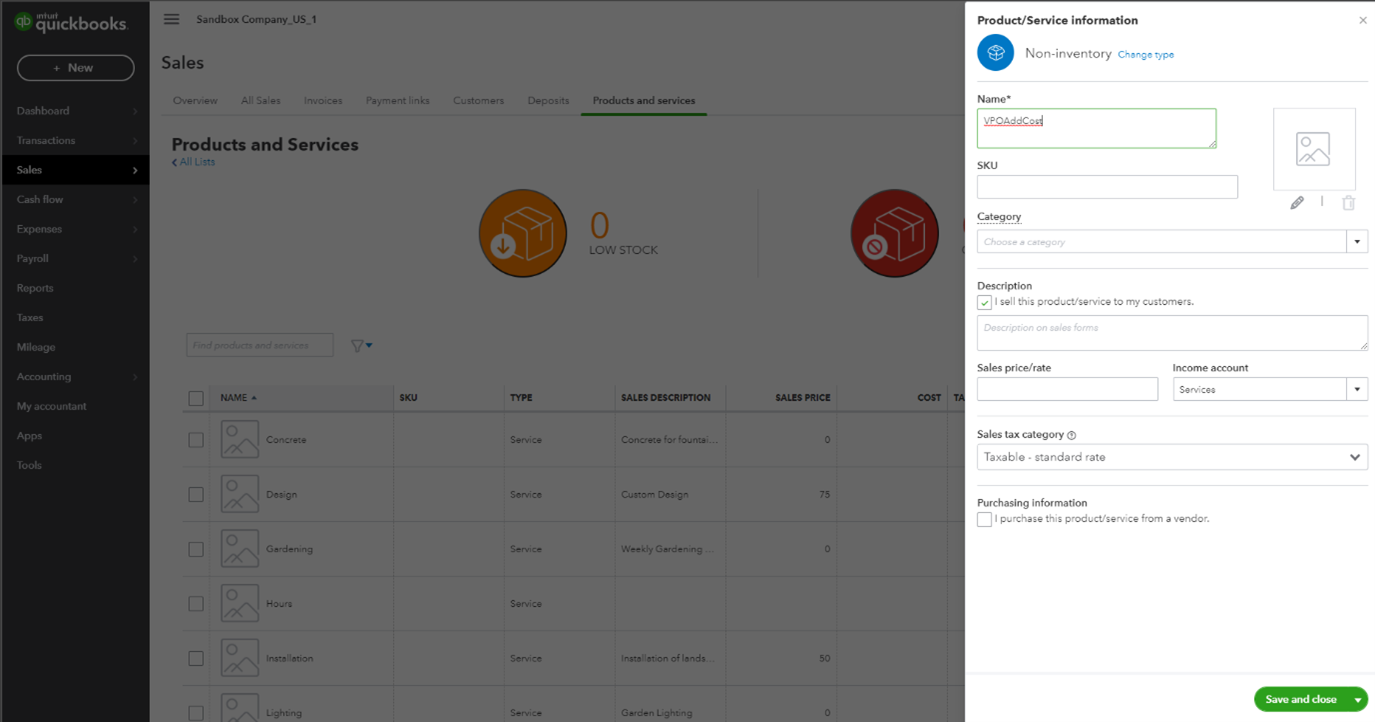
If you are new to QuickBooks Online and do not yet have this setup, you would need to choose the code you would like and add it as a non-inventory item. To do so go to Sales > Products and Services. Here you will see all your item types and can create new ones.
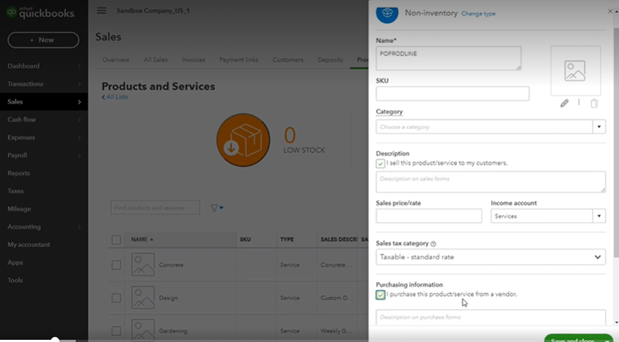
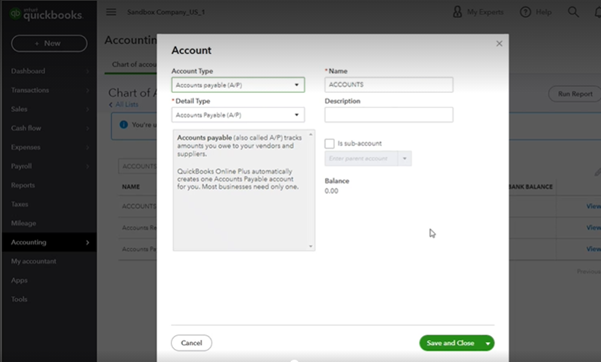
To create a new one, click New and select Non-inventory. This will bring you to this screen where you can enter the product name. For ALL Account Mapping fields EXCEPT the Sales Invoices and Accounts Payable field, you will need to check I purchase this product/service from a vendor under Purchasing Information. Once completed click Save/Close.
NOTE: If you have QuickBooks Simple Start or Essentials, you will NOT see the option to check the I purchase this product/service from a vendor under Purchasing Information. In this case, continue with the steps above to create Non-inventory product, enter the product name and click Save. The check will not be needed as the version of QuickBooks you have does not support the Purchase Orders piece of the integration. QuickBooks Plus or Advanced will be required in order to see this option as this will enable the Purchase Order integration.
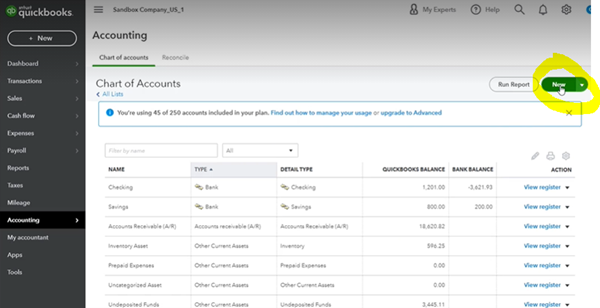
For the Accounts Payable field, you can locate this under Accounting > Chart of Accounts in your QuickBooks Online account.
If you do not yet have this setup, you can click New and input the information before clicking Save and Close.
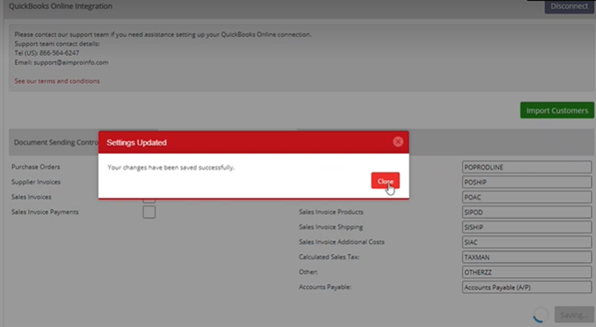
All Account Mappings will need to be entered in order to save your changes. Once all fields are entered click Save Changes. This would complete the setup for QuickBooks Online.
Once the integration is set up as soon as the trigger to send the document is done in Tech Suite this is then sent over to QuickBooks Online. It is triggered by saving the document as a PDF, printing the document or sending it via the send/share option.
NOTE: When Sales Payments are added to the Tech Suite these will automatically be matched to the Sales Invoice when they are transferred over to QuickBooks.
![]() © 2022 AIM Smarter, Limited. All Rights Reserved. Company Reg No. 05225734 aimsmarter.co.uk
© 2022 AIM Smarter, Limited. All Rights Reserved. Company Reg No. 05225734 aimsmarter.co.uk