How to Raise a Purchase Invoice
No video selected.This help guides will show you how to raise a purchase invoice
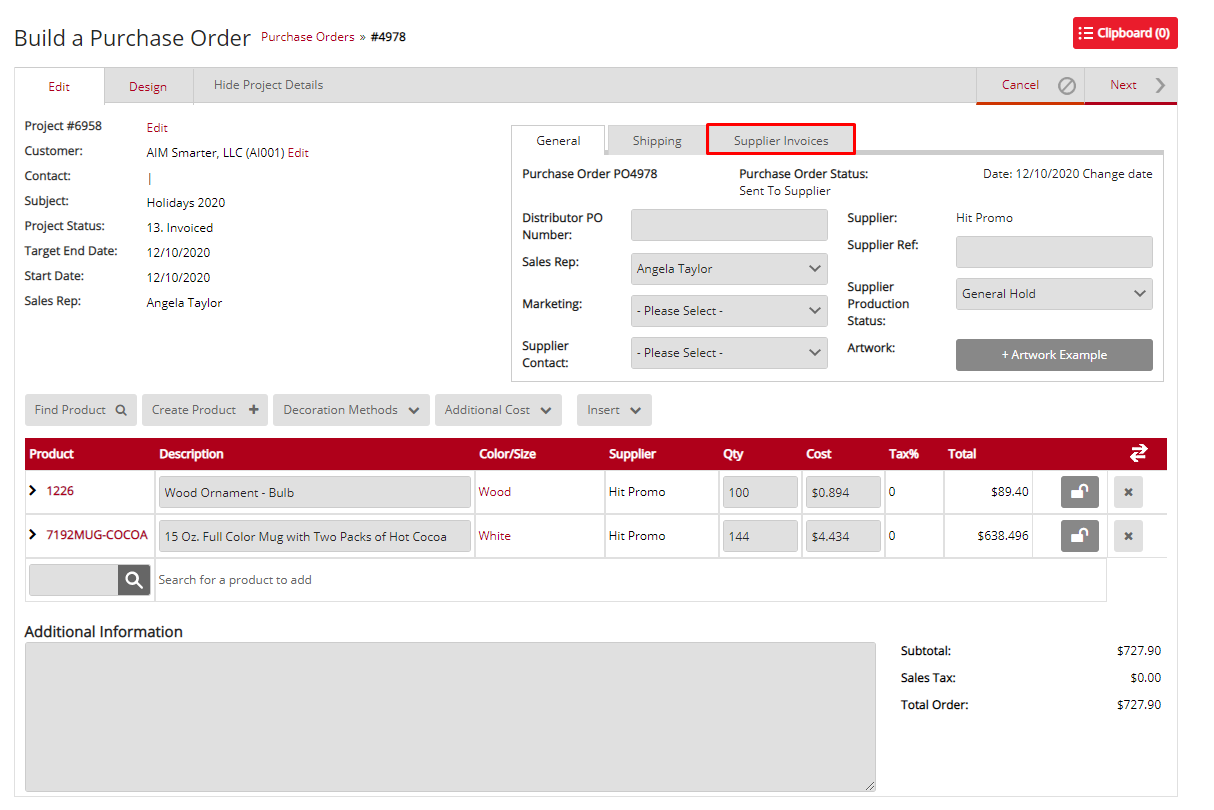
Please note an invoice can only be raised if the purchase order status is “Sent to Supplier”
Step 1: click into the Supplier invoices tab on the right-hand side
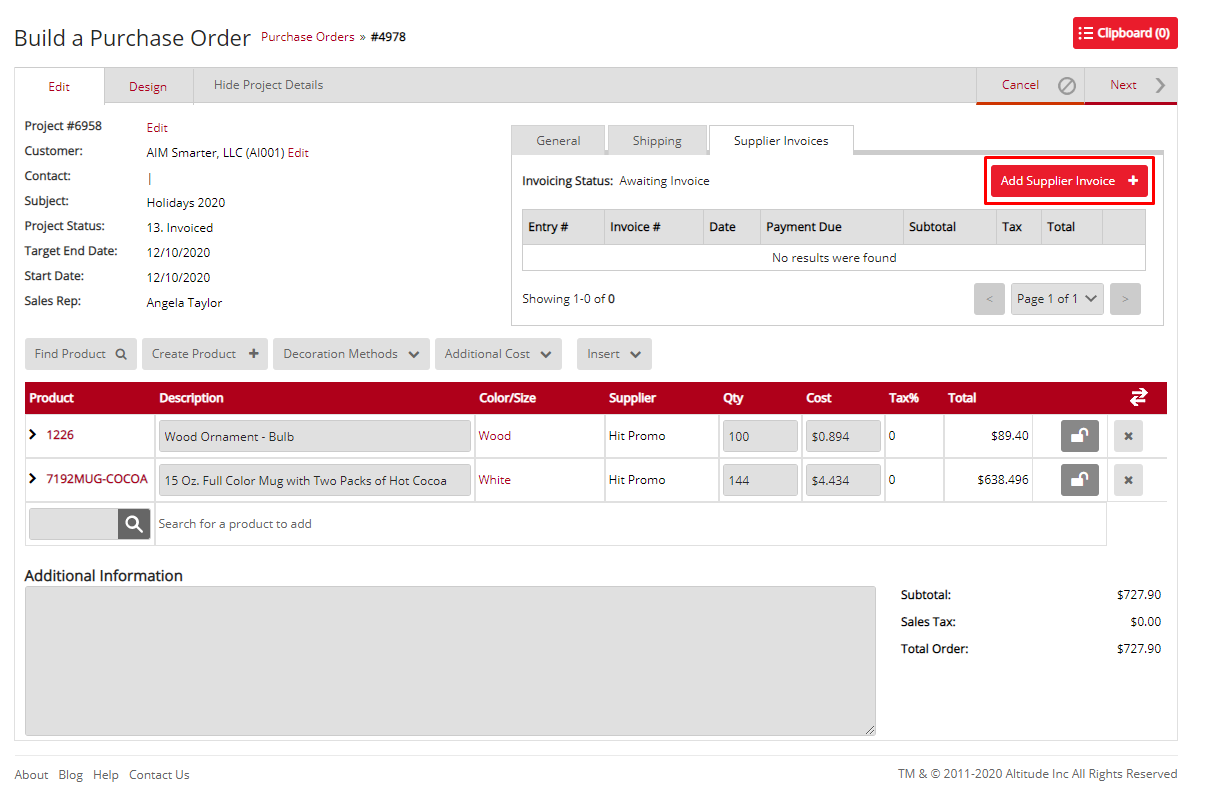
Step 2: click the add supplier invoice option
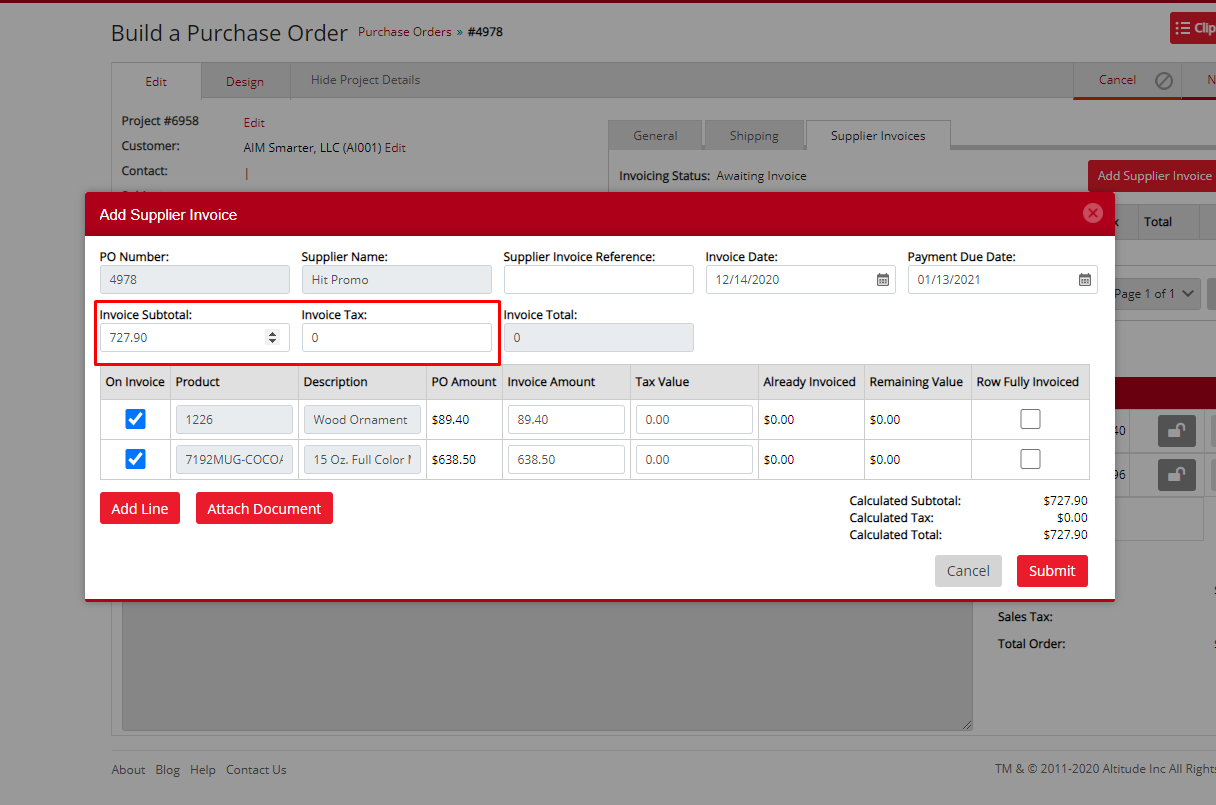
Step 3: When the invoice screen opens you will see the purchase order lines that you can invoice
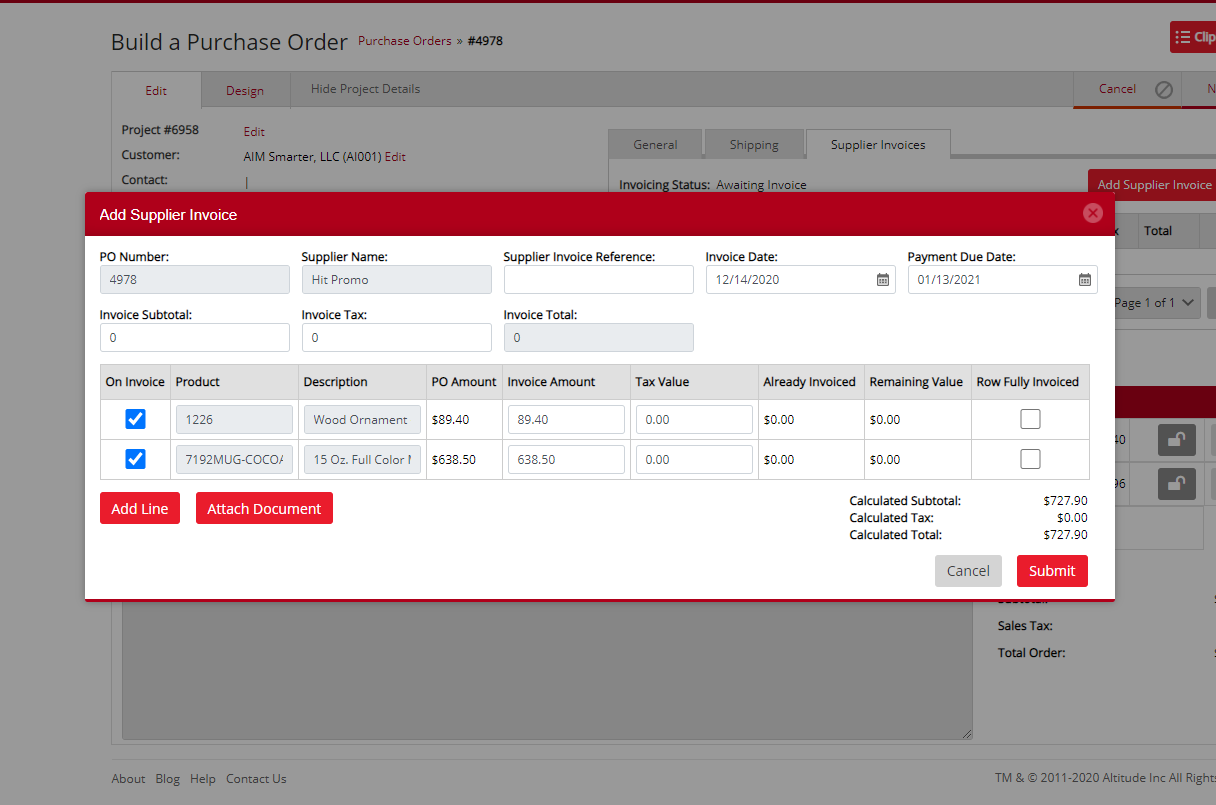
Step 4: you can select the lines you want to invoice on the left-hand side

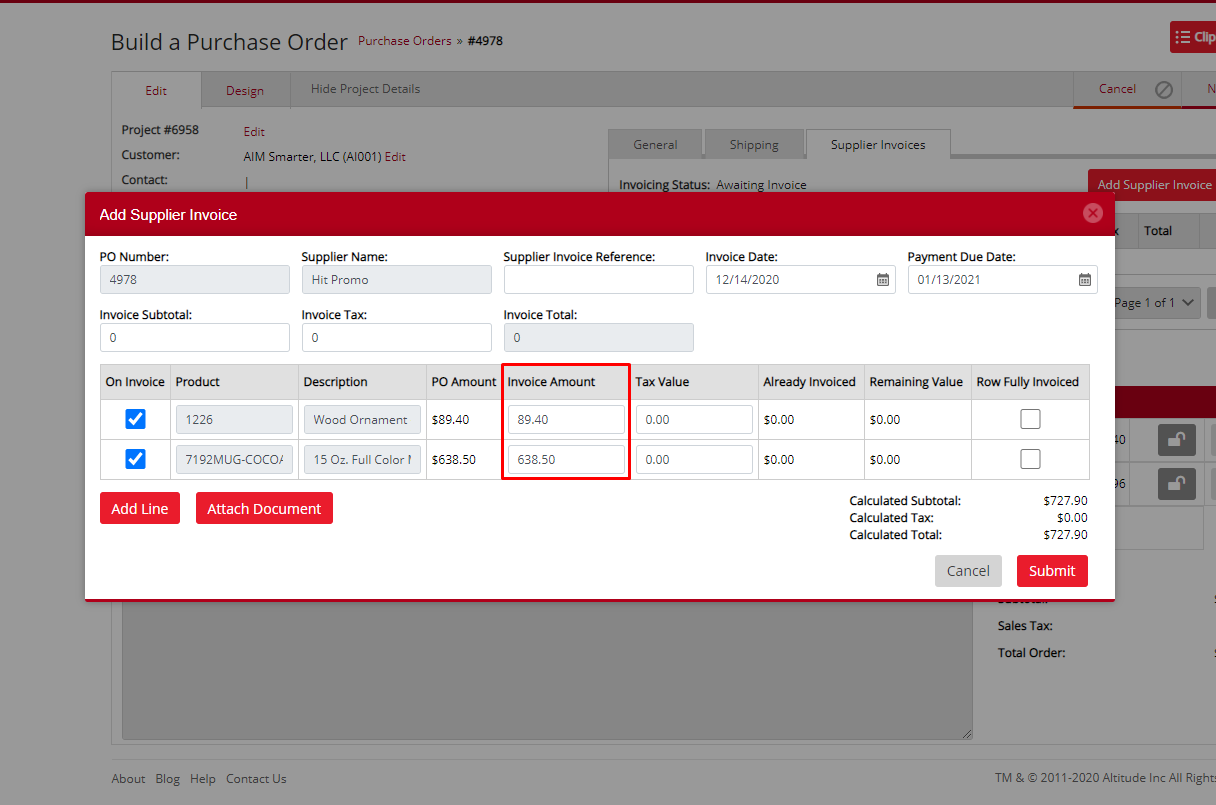
Step 5: you can edit the Invoice amount if this differs from the purchase order
Step 6: Edit the Tax value
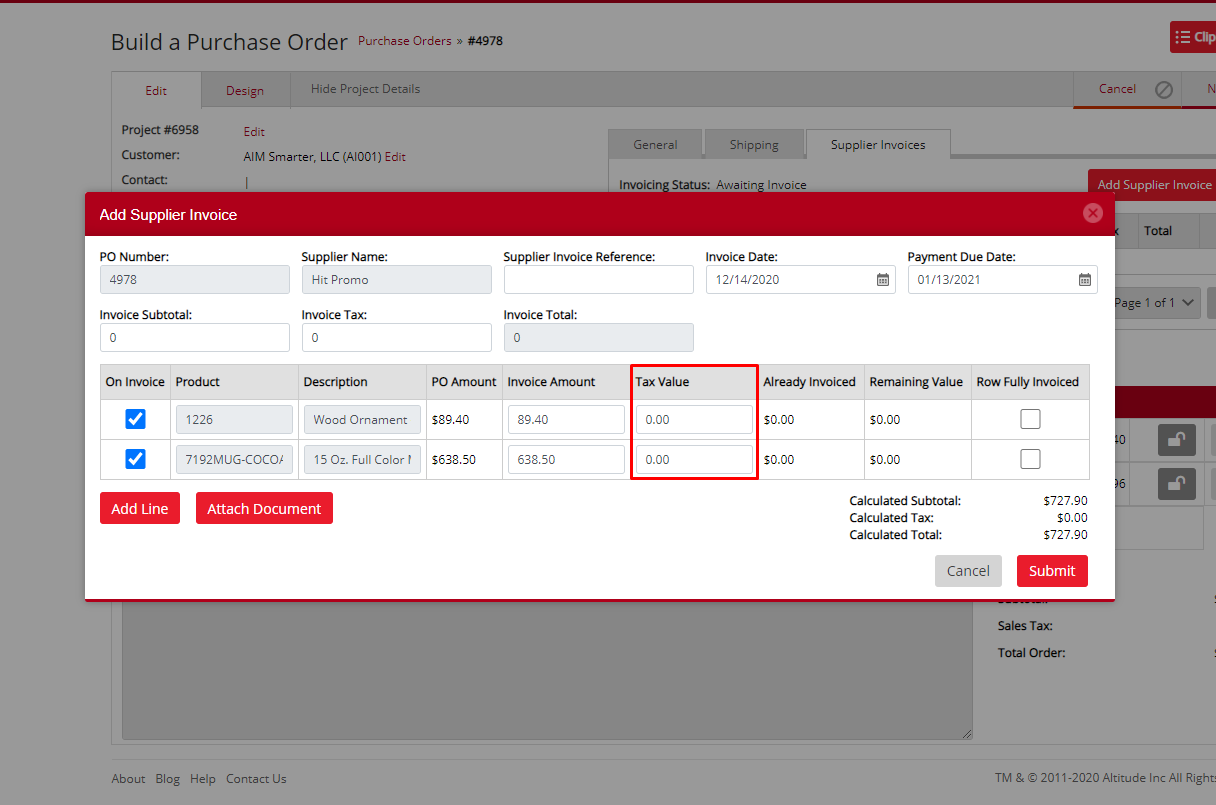
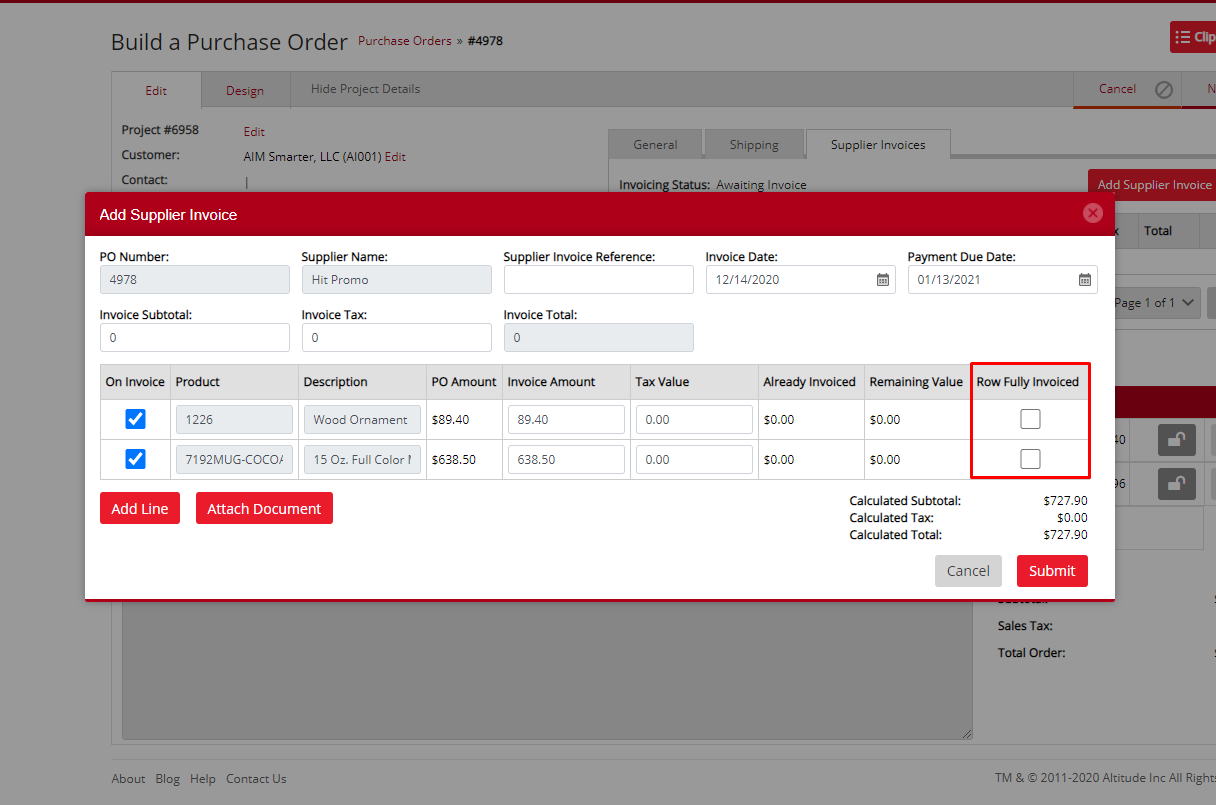
Step 7: Set if the row is fully invoiced if the invoice amount is lower than what is on the purchase order
Step 8: if needed you can add a new line to the purchase invoice if it differs from the PO or if you need to add an additional charge

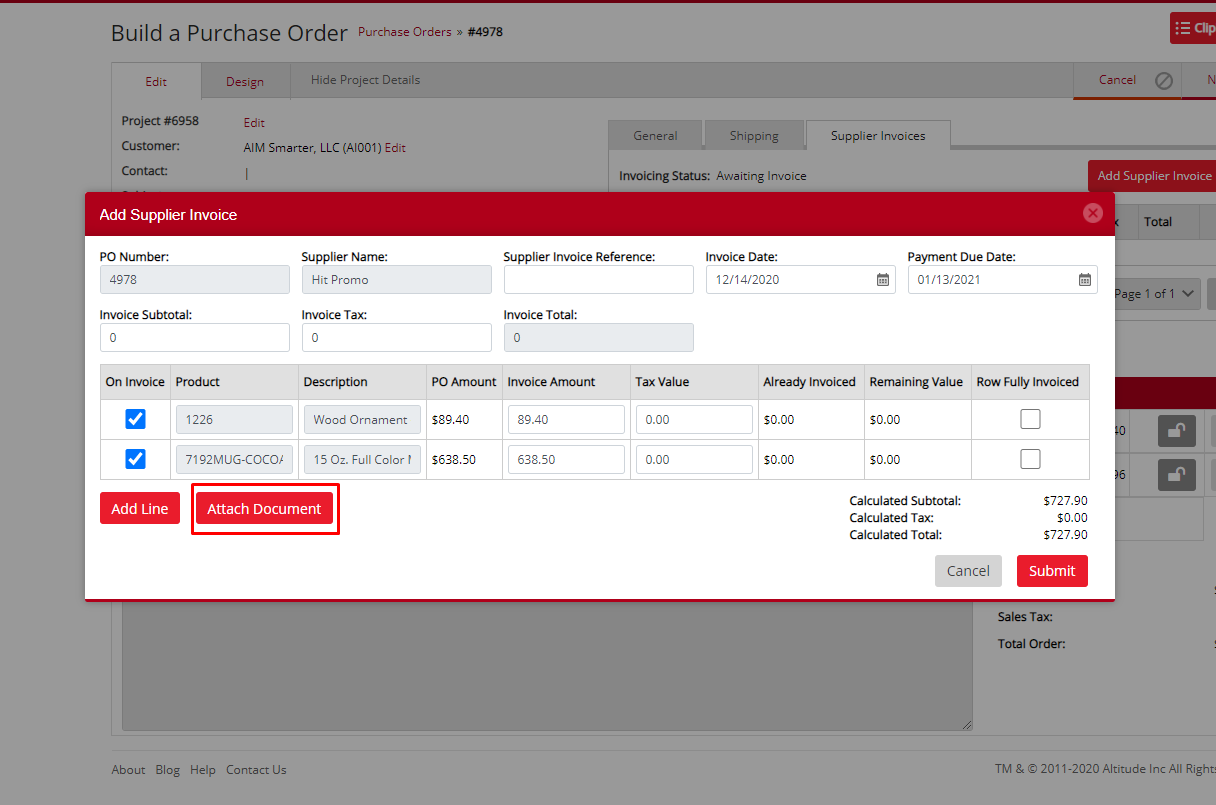
Step 9: You can attach the invoice that you have received from the supplier for reference purposes by clicking the attach document button
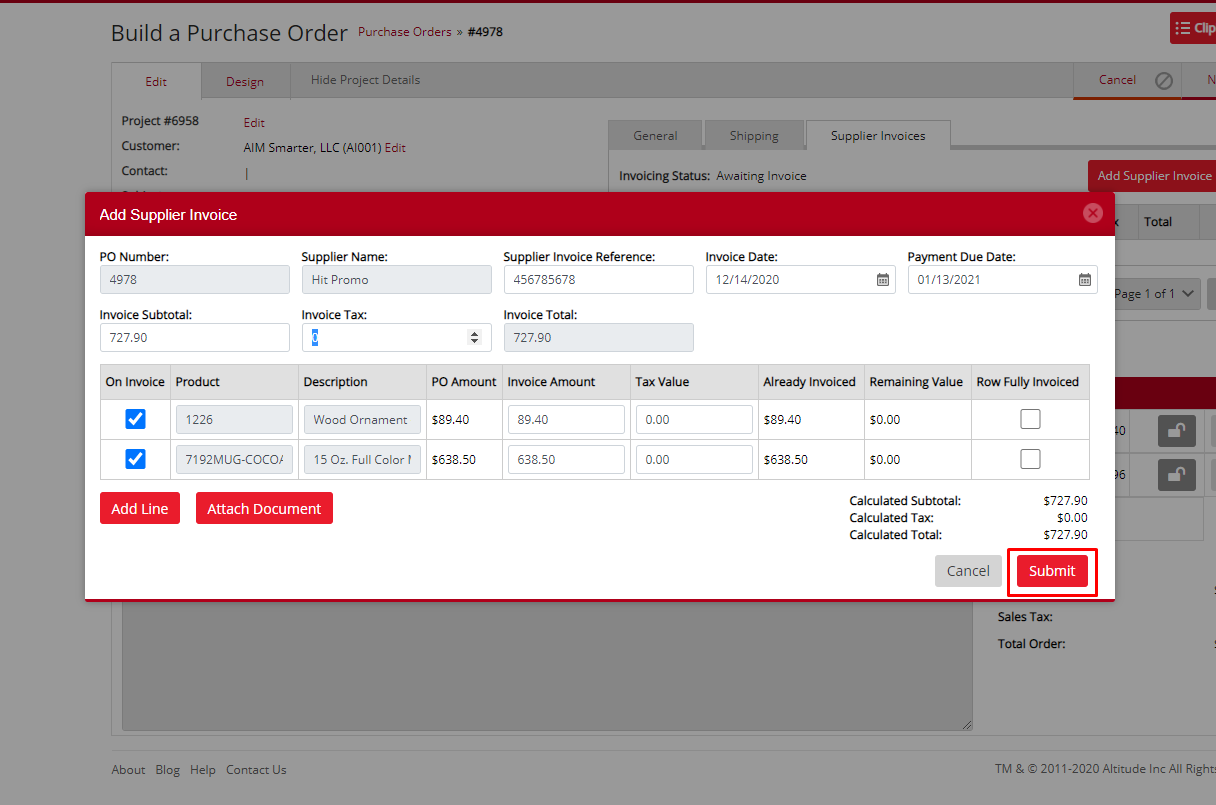
Step 10: Enter a supplier invoice reference

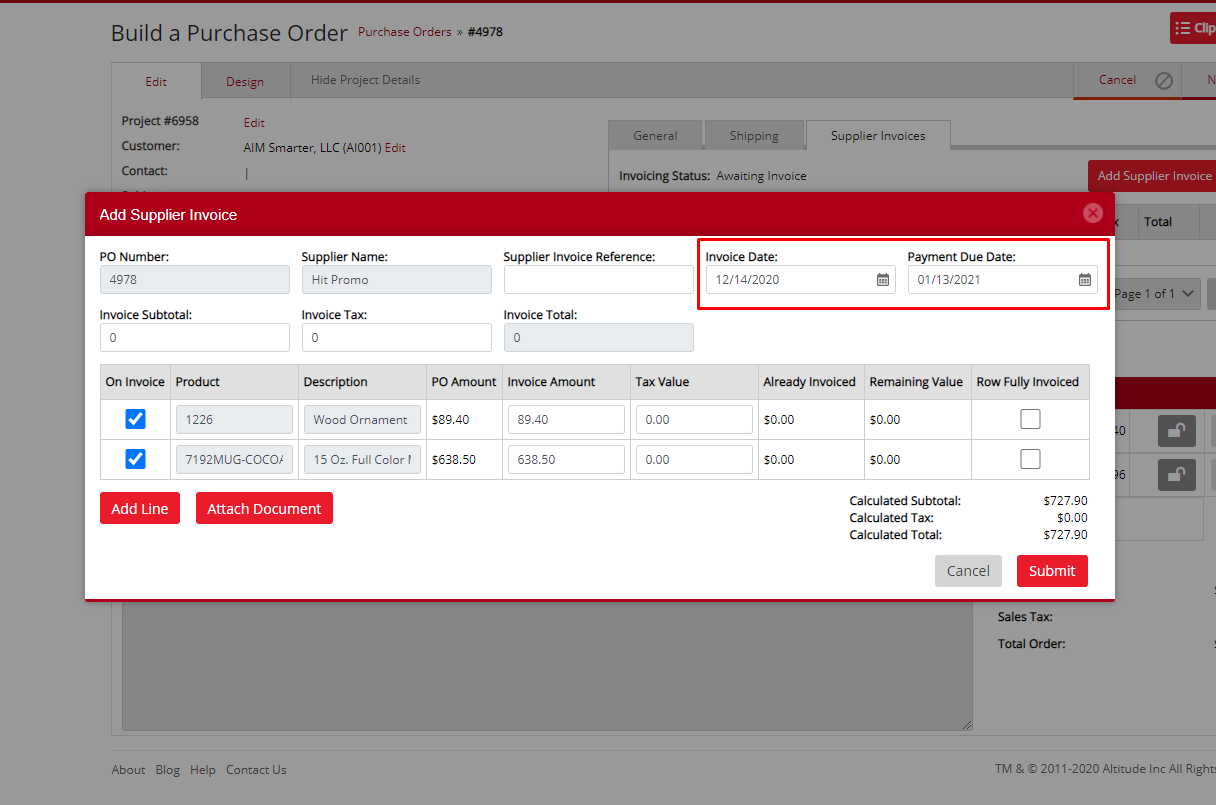
Step 11: you can set the invoice date and date due
Step 12: Finally, the last step of the process before submitting the invoice is to enter the subtotal and invoice tax amounts as they are on the invoice. This is used as a check to make sure your happy with the amounts that will be posted
Step 13: Click on the submit button on the bottom right to post the invoice
![]() © 2022 AIM Smarter, Limited. All Rights Reserved. Company Reg No. 05225734 aimsmarter.co.uk
© 2022 AIM Smarter, Limited. All Rights Reserved. Company Reg No. 05225734 aimsmarter.co.uk