February 2022 Release
No video selected.Summary of New Features
- Inventory Feature
- Ability to search via ASI Product ID from AIM Websites with an ESP Product Feed
- Image Quality Improvements
Inventory Feature
The Inventory Feature is available for all Tech Suite users and will allow you to add inventory to your products. Now, when you add a new product to your Tech Suite you will be able to select if you want that to be an Inventoried Product. Once that product is saved you will be able to go back in at any time and adjust the inventory level. This product can be used on any of your order management documents and websites. If you’re interested in using the Inventory Feature, please contact customerservices@aimsmarter.co.uk and they will provide you access to this.
Creating an Inventory Product
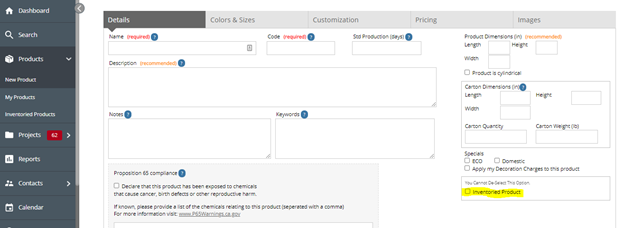
To add an inventoried product, go to Products and select New Product. Here you will see there is an Inventoried Product checkbox. Please note that if this box is checked and the product has been saved, the user will not be able to deselect this.
Learn more about creating an inventory product here.
Adding Inventory to your Product
Before you can start adding inventory to the items, you will have to click Check/Save Product. A message will come up stating that the product has been flagged as a Stocked Product. From here, you may click Amend Product or click View This Product and then Edit Product.

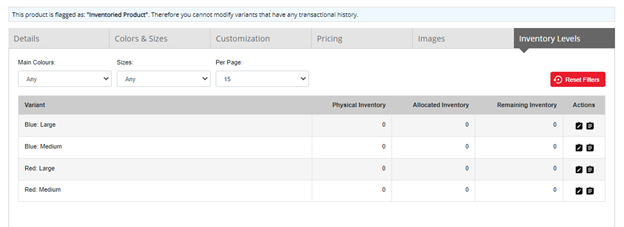
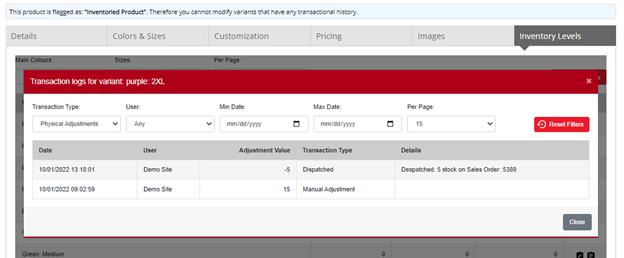
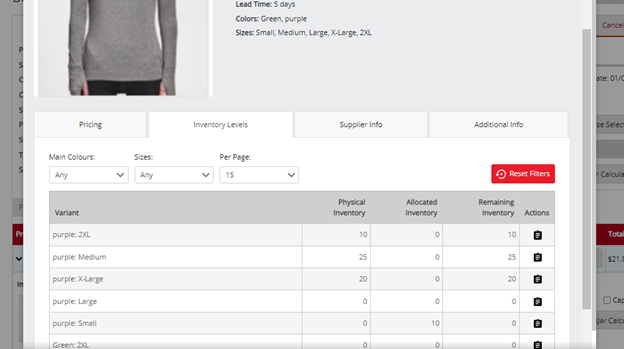
This will take you back to the product screen where you will see an additional Inventory Levels tab. You can filter by Colors, Sizes, and the number of variants you would like to see per page. Under Actions, you will be able to adjust the inventory and view the transaction log. The transition log will record all transactions and includes a date/time stamp, user who made the adjustment, the adjustment value, and any details.
Learn more about adding inventory to your products here.
Using an Inventory Product
Once the product and inventory has been added, you can search and add this to any of your order documents as you would with any other product. To locate your product, go to Products and click Inventoried Products. This will show you all your inventoried products. You can filter by most recent or use the product search to further filter your results. Once you locate your product, you can click on it to view further details which will include the inventory levels.

The Sales Order is where the inventory will be deducted from. There will be a yellow triangle stating that a color/size will need to be chosen for the product if you have not done so already.
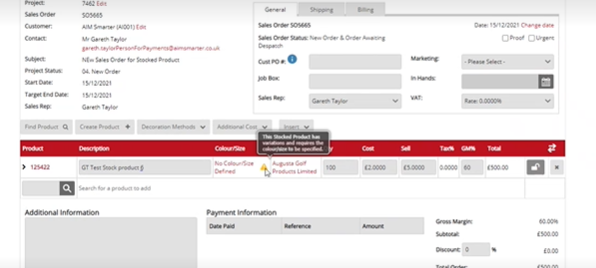
If you choose a color/size that is not available, an i icon will appear that shows the item is Out of Stock.
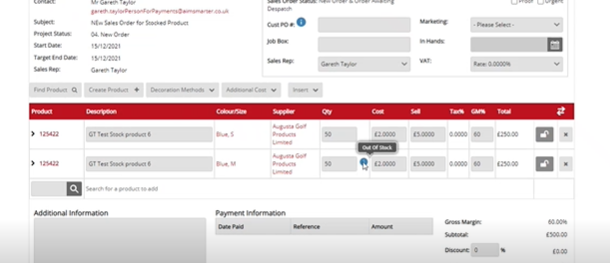
The selected colors/sizes on the sales order will show under Allocated under the product detail. The Allocated Inventory will subtract from the Physical Inventory and automatically calculate the Free Inventory.
Learn more about using an inventory product here.
Dispatching Products
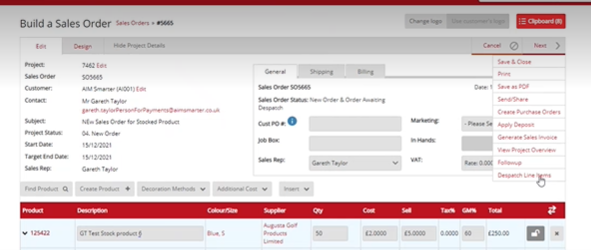
Hover over next and click Dispatch Line Items. Once items are dispatched, it will move from the Allocated Inventory and update the Free Inventory accordingly. If you try to dispatch an item that has less than what is in stock, a message will pop up stating there is not enough in inventory.
Learn more about dispatching products here.

Inventory Items on Websites
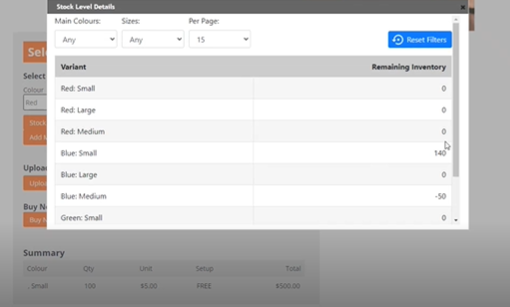
Inventory products you add can also be used on your websites. These will include an inventory info tab on the product detail. When an order is placed on your website, this will push into your Tech Suite as a sales order. You can follow the instructions here to dispatch the items on your sales order.
Ability to search via ASI Product ID from AIM Websites with an ESP Product Feed
Now on your websites that include the ASI product feed, you will be able to search by the ASI product code on the search box of the website.

Image Quality Improvements
We’ve made an enhancement to improve the image quality of logos on documents. Your company logo and customer logos on the order management documents will appear sharper.
Can't Find The Answer You Need?
 © 2022 AIM Smarter, Limited. All Rights Reserved. Company Reg No. 05225734 aimsmarter.co.uk