No video selected.
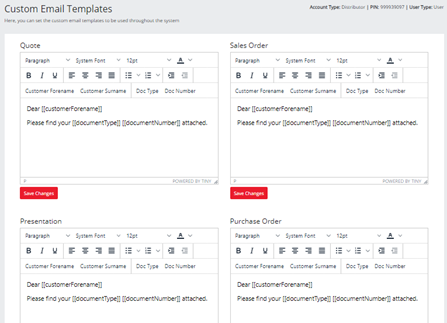
You can set the custom email templates to be used throughout the system under Settings > Custom Email Templates. Standard text and merge fields including Customer Forename, Customer Surname, Document Type, and Document Number, will be selectable from the setting area. This will populate the contact information of the customer you are sending the document to along with that document type and number. Click Save Changes for each email template you adjust.
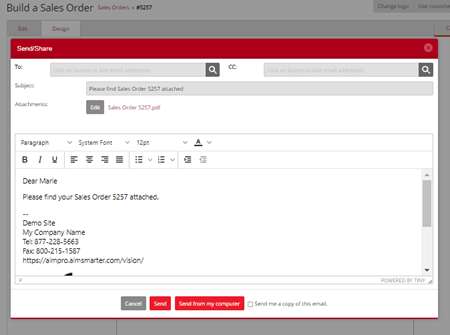
NOTE: If a contact is not selected and you are using the merge fields for CustomerForename then this will be replaced with Dear Customer.

Your signature will continue to populate from the information you have in your Company Details at the bottom underneath the body of the email.

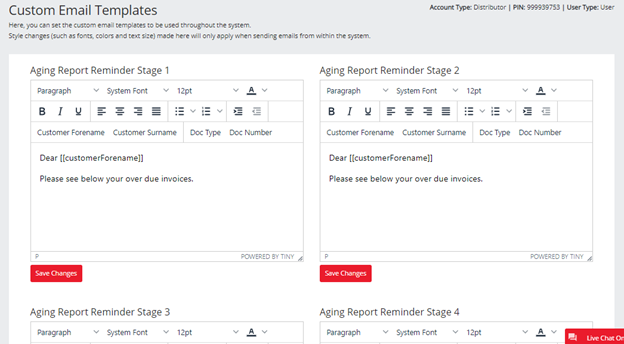
If you will be using the AR Notifications, you may also put custom email templates in place for that. In order for those option to display you will first need to go to your Miscellaneous Settings and check Enable Auto Chase Overdue Invoices. Further customization for the AR Notifications may be set in the Notifications section.

Then, once you go back to your Custom Email Templates, you will see the option for the 4 different AR Notification emails. Keep in mind that this email will go to whomever you have checked off in your Notification Settings. So if you have the Customer Rep and Sales Rep selected, that same email will go to both.
