Adding Categories
No video selected.
Adding Categories
This guide will go through how to add custom categories for products on your website, as well as how to hide them.
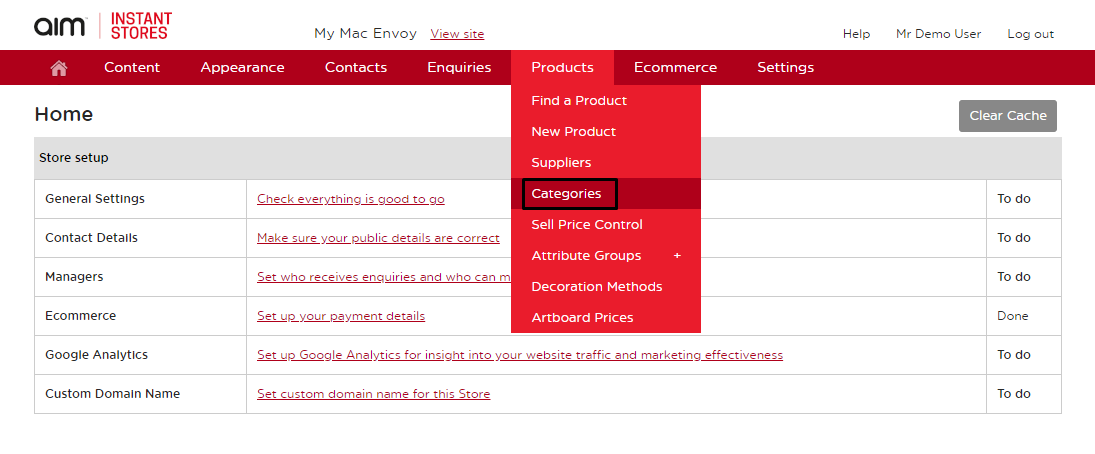
- From the management section of your website, hover over the ‘Products’ tab and select ‘Categories’ from the drop-down list.

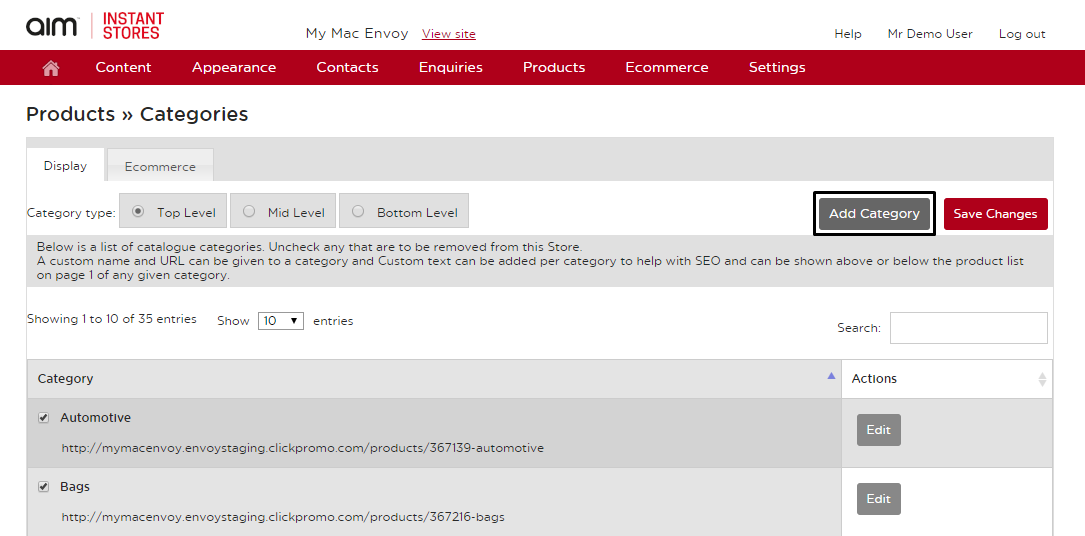
- To add a new category, click ‘Add Category’ in the upper right-hand corner.

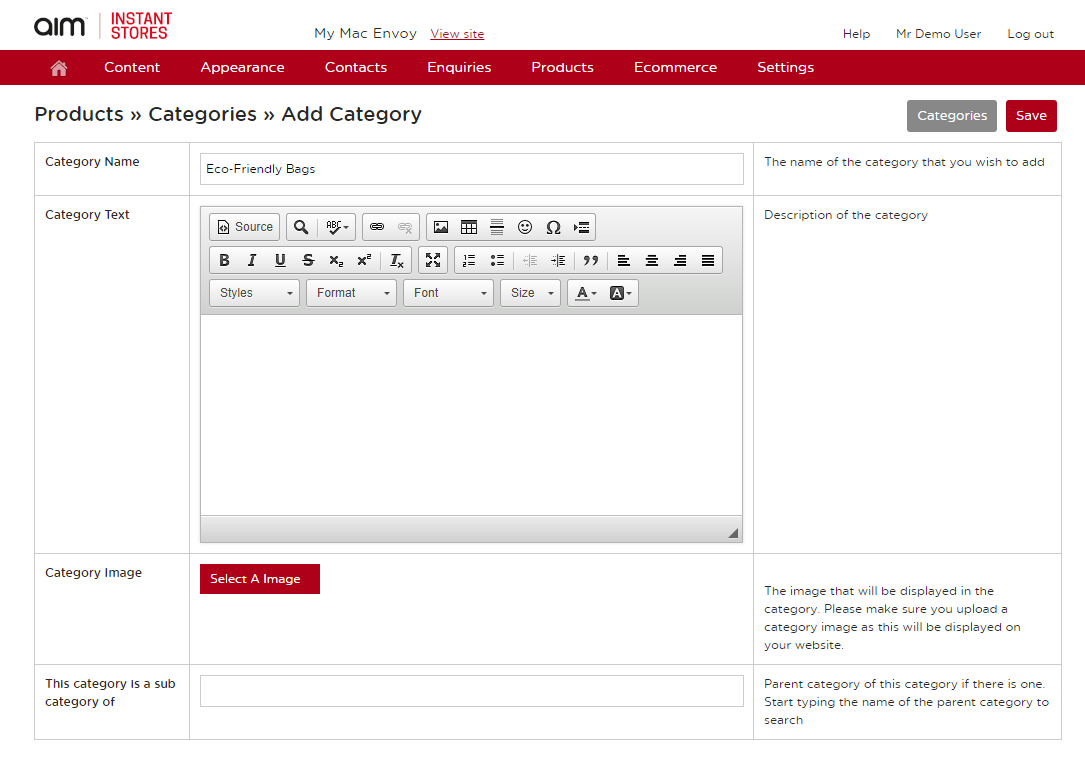
- From this screen, you can enter the category name. The other fields are optional unless you want to add your category to an existing one, which you can do in the last section by searching for the category. Once completed click Save in the upper right-hand corner.

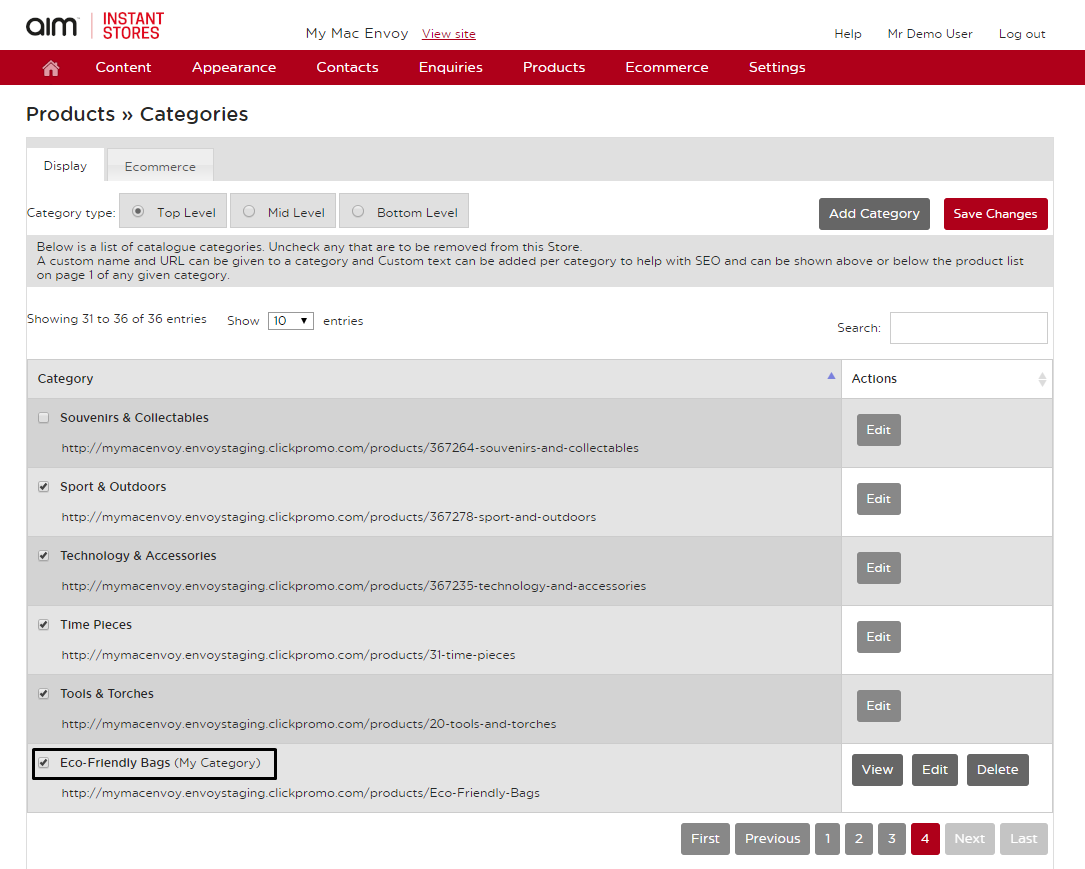
- Once saved, it will take you back to view all the categories. You can find your custom category on the last page of either Top, Middle or Bottom Level, depending on where you have added it. At this time, you can also untick any categories you do not wish to include on your site. Once you have done this, click on ‘Save Changes’ in the upper right-hand corner. The next step will be to add products to this or other categories you wish, this information can be found in ‘Adding Products’ and/or ‘Copying Products’ help sheet.

Last updated: June 12, 2020